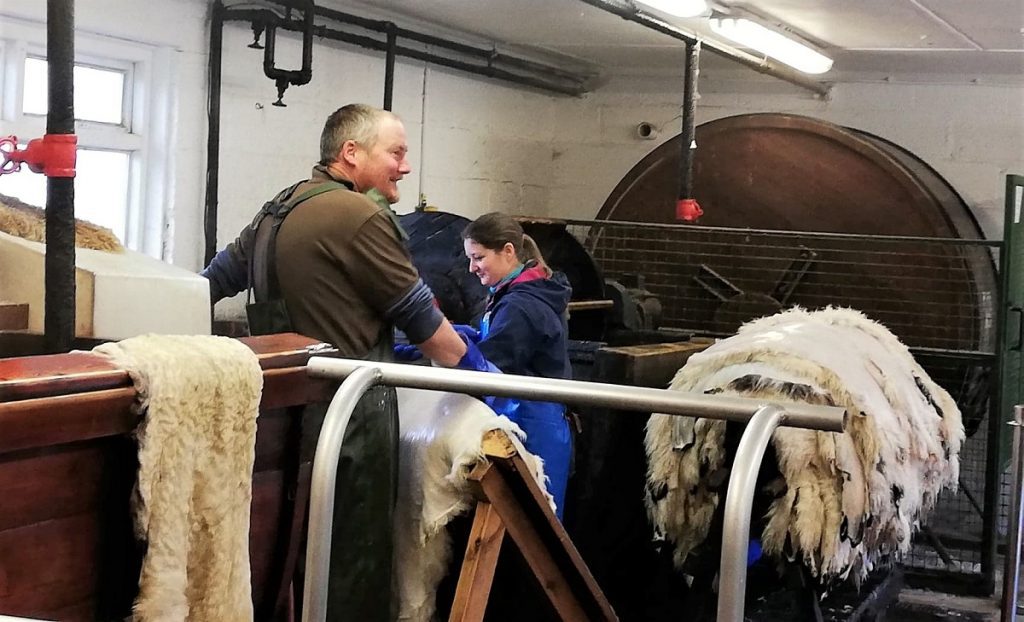
Pete and Becky, our tanners, rotate tasks in their working week to keep production going throughout the year. Here, they tell us what a week as a tanner looks like.
Enjoy the read!
DAY 1
This is when we start production of a new batch of sheepskins. We head up to our skin store and collect a batch of 20 salted raw skins in a wheelbarrow. We bring them down into the tannery and put them into the big paddle (the equivalent of a bathtub for sheepskins) full of cold water. We repeat this so we have a total of 40 skins (more if they are smaller) soaking for around half an hour. The paddle is turned on and gently gives the skins a mix to rinse the salt off and rehydrate them. Once we have done this, we pull all the skins out and drain the paddle. We then refill with cold water and a little bit of soap, to start cleaning and degreasing the wool and skin which are left overnight to soak.

Next job….
Buffing – from last week’s batch we have a few skins to buff. We do this on our granite buffing wheel. The granite comes from Ailsa Craig off Scotland’s West Coast. It spins at 1000 rpm so mind your fingers! Once we have our buffing kit on, we get to work!

We gently press the leather side onto the spinning wheel which removes a fine layer to leave a beautiful suede finish. This is a skilled job and we must be careful not to put too much pressure on the wheel otherwise it’s possible to make a hole! If this does happen, nothing is wasted; it either goes as a pet mat or is cut up for sewing. Phew! We then give the fleece a trim around the edges to get rid of any hard leather edges.

Next job….
We then head to the drying room where we will start on last week’s batch of wet skins, which are waiting to be dried. First, they need to get a coating of oil on the leather side to prevent them from becoming too hard and splitting whilst drying. We brush the oil on and then put four hooks (tenter hooks) one on each corner ready for hanging up.

The skins are put up on the drying room racks with the wool facing inwards, using more tenter hooks to stretch them out. Once all the skins are on the racks, the fan heaters go on and the room is heated for around 3 days until they are dry.

Fun fact – the saying “being on tenter hooks” comes from the tenter hooks we use for the skins – meaning stretched to your limit.
DAY 2
The most exciting/enjoyable/hardest/rewarding/tiring day! Fleshing day…Not only does it save money on gym membership but it’s the tanners' favourite day.
The first thing we do is get all the skins that have been soaking overnight in cold water out of the paddle. We refill the paddle but this time with warm water around 35c, a little soap and in the skins go again. After a 30-minute soak and once the skins are nice and warm, it’s time for them to be fleshed! One by one we pull the skins out of the paddle and transfer them over to the wooden beam.

With the skin side facing outwards, we place the wet skin on the curved beam and scrape down the skin with a two-handled curved fleshing knife to clean it. We then give both sides a thorough rinse and transfer them over to the “horse” (long wooden beam on wheels).

Next up, we fill the paddle again with cold water to make up a pickle mix. This helps the pores of the skin open up - ready for the tanning process.
Skins are then transferred back over to the paddle via the “tanner’s toss” method! They get thrown from a distance into the paddle rather than placed – this gives the skins an extra stretch. The paddle is then turned on for around fifteen minutes.

Fun fact – the paddle takes approx. 25mins to empty and the same time to refill.
DAY 3
Just Pete in today and the first job is ironing. Our machine is a rotary, gas fired iron.
First, we light the iron which takes roughly thirty minutes to heat up. Meanwhile, we spray the wool of the combed skins with a lustre agent – hair conditioner for sheep! We then feed the skins through the iron to melt the lustre agent in the wool and give it final comb with the fine needles attached to the drum. This really finishes off the sheepskins and gives a super soft and silky feel to the wool.

Next job…
Is to mix up the Mimosa bark (our sustainable and environmentally friendly tanning agent) ready for the tanning bath. We empty the Mimosa into a drum and add warm water and give it a good mix to combine it (baking skills come in handy here!). Once the mixture is smooth and lump free, we add it to the tanning bath. Now time for the skins - we take half the batch of skins from the pickle and transfer them over to the tanning bath where they get a gentle paddle. We regularly check and move the skins to ensure that the mimosa has done its job and no crease is left untanned.
Next job…
TUMBLE TIME!
We take half of the previous batch of skins out of the drying room and transfer them into our oldest piece of equipment: the tumbler. This big wooden drum has paddles around the inside which help to throw the skins around the interior as it rolls. All this bashing helps to soften up the leather and after two nights they come out beautifully supple.

Fun Fact – The iron gets to temperatures around 120c…hot hot hot!!
DAY 4
A day off for team tanner! That’s not to say the workshop is shut though…there’s always plenty to see and it’s still open for you all to have a guided tour around.

DAY 5
The skins are ready to come out of the tanning bath…we’re always excited to see how the leather is looking. First thing we do is line up some buckets underneath the tanning bath to catch any mimosa liquor that runs off (we like to reuse and recycle where we can). We get suited and booted and take the skins out. Once drained, we then transfer them on to the fleshing beam where they get a good long rinse with cold water to remove any left-over tannins. Once they’re all done (it always takes longer then you think), they are left on the “horse” to drip dry overnight.

Next job…
Is to mix another load of Mimosa bark up ready for the tanning bath. We take the remaining half batch of skins from the pickle and transfer them over to the tanning bath where, as before, they are mixed thoroughly and then left for a couple of days with the occasional paddle. We empty the pickle and refill the paddle with cold water ready for the new batch of raw skins to go in next time.
Next job…
Getting the lovely soft skins out of the tumbler. We make a nice pile of these ready to be buffed in the morning. The tumbler is then refilled with the next dry batch.
Fun fact – the tumbler is over 120 yrs old.
DAY 6
Usually just Becky in today to finish the buffing from last week.
Next job….
To the drying room where we start on the first half of the batch that are waiting on the “horse” from yesterday. We oil them and hang them up as we did last week with the last batch.
Next Job….
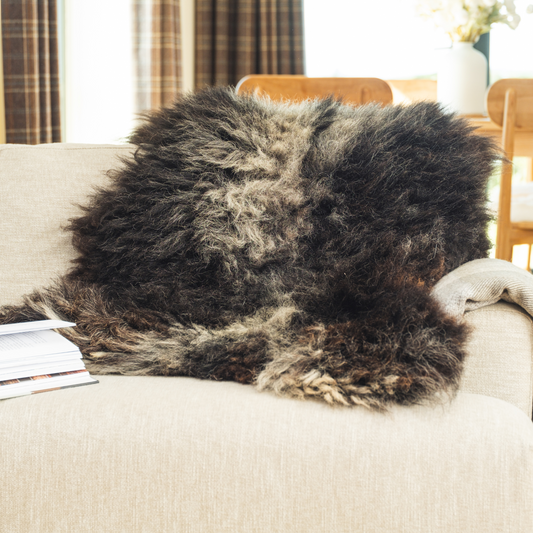
Head up to our storage shed to start the process of finishing off those ironed skins. They have to be graded, trimmed, branded with our ‘Mimosa collection’ stamp and priced. Then they are hand combed or brushed. Finally, they are ready to be taken up to our showroom or delivered to our Portree shop.

Fun fact – We have no template for trimming as it is all done by eye, so every skin is unique.
DAY 7 - WEDNESDAY
Ironing again - Becky’s turn!
Next job…
Empty the tumbler of more lovely soft skins, that’s another batch ready for buffing.
Next Job….
More finishing of the sheepskins in our storage shed, ready for you all to run your hands through!
And we will start all over again the next day.

Fun fact – The final hand comb is done with a slicker brush which is very similar to a dog or cat brush. This is the best way to look after your skin at home. A quick shake and a good brush and it will last for years to come.


